Want Claude to work on your website files? Connect Claude Code to your hosting server, then choose the folder containing your site.
If you already use SFTP, some of the connection details will look familiar. The setup shown here uses SSH, which lets Claude run on the server as well as access files. An SFTP-only account will not be enough.
Before you start
Ask your host for an SSH-enabled account, its username, server address and port. The server must support Claude Code, including a working shell and SFTP. Some shared hosting plans restrict this.
Use a staging copy of your website while you get familiar with the setup. Keep a current backup before making changes.
Set up your SSH key first
Use the Mac or Windows instructions below, then continue to the Claude setup. Both examples connect to a Linux hosting server.
Mac: use Terminal
These steps are for a Mac connecting to a Linux hosting server. Replace siteuser and server.example.com with the SSH details from your host. Use your hosting account password, not your WordPress password.
Log in to the server
# Test SSH access from Terminal on your Mac.
ssh siteuser@server.example.com
If your host uses a different port, add it to every SSH command below, for example ssh -p 2222 siteuser@server.example.com. On your first connection, check the server fingerprint with your host before accepting it. Enter your hosting password when prompted. Nothing appears while you type.
Once you have logged in successfully, close the session. Create the key on your Mac, rather than on the server.
# Return to your Mac before generating the key.
exit
Create a key on your Mac
# Create the local SSH folder and a dedicated website key.
mkdir -p ~/.ssh
chmod 700 ~/.ssh
ssh-keygen -t ed25519 -f ~/.ssh/website -C "website access"
Set a passphrase when prompted. If asked to overwrite an existing key, choose no and use a different filename.
This creates two files: ~/.ssh/website is your private key and stays on your Mac. ~/.ssh/website.pub is the public key you add to the server.
Add the public key to the server
Run this on your Mac. It logs in again using your hosting password and appends the public key to the server’s authorised keys file, keeping any existing keys.
# Add your public key to the same hosting account and set its permissions.
cat ~/.ssh/website.pub | ssh siteuser@server.example.com 'mkdir -p ~/.ssh && chmod 700 ~/.ssh && cat >> ~/.ssh/authorized_keys && chmod 600 ~/.ssh/authorized_keys'
If your host disables password login or manages SSH keys through its control panel, add the contents of website.pub through the panel instead. Never upload the private key.
Test the key, then use it in Claude
# Test a fresh connection using your private key.
ssh -i ~/.ssh/website siteuser@server.example.com
You may be asked for your key’s passphrase. If it still asks for the hosting account password, key authentication has not worked yet. Check the public key was added to the same server account.
Once the key works, enter ~/.ssh/website in Claude’s SSH key field when adding the connection below. The SSH host and port stay the same.
Windows: use PowerShell
Open Windows Terminal and choose a PowerShell tab. Replace siteuser and server.example.com with your hosting SSH details.
If Windows does not recognise ssh or ssh-keygen, search Windows Settings for Optional features and install OpenSSH Client. You do not need OpenSSH Server on your PC.
Log in to the server
# Test SSH access from PowerShell on your PC.
ssh siteuser@server.example.com
Check the server fingerprint with your host before accepting the first connection. Enter your hosting account password when prompted. Nothing appears while you type. If your host uses a different port, add -p 2222, or its actual port, to every SSH command.
# Return to PowerShell on your PC before creating the key.
exit
Create a key on your PC
# Create the local SSH folder and a dedicated website key.
New-Item -ItemType Directory -Force -Path "$env:USERPROFILE\.ssh" | Out-Null
ssh-keygen -t ed25519 -f "$env:USERPROFILE\.ssh\website" -C "website access"
Set a passphrase when prompted. If asked to overwrite an existing key, choose no and use another filename. The private key is C:\Users\YourName\.ssh\website. The public key is the same path with .pub on the end.
Add the public key to the server
Run this in PowerShell on your PC. It logs in using your hosting password and appends the public key to the Linux server’s authorised keys file.
# Add the public key to your Linux hosting account and set permissions.
Get-Content "$env:USERPROFILE\.ssh\website.pub" | ssh siteuser@server.example.com 'mkdir -p ~/.ssh && chmod 700 ~/.ssh && cat >> ~/.ssh/authorized_keys && chmod 600 ~/.ssh/authorized_keys'
If your host manages keys through its control panel, add the contents of website.pub there instead. Keep the private key on your PC.
Test the key, then use it in Claude
# Test a new SSH connection using your private key.
ssh -i "$env:USERPROFILE\.ssh\website" siteuser@server.example.com
You may be asked for the key’s passphrase. If the server still asks for your hosting password, check the key was added to the correct account.
In Claude’s SSH key field, browse to C:\Users\YourName\.ssh\website, using your actual Windows username. Select the file without .pub. Keep the same SSH host and port.
Microsoft’s key setup reference: https://learn.microsoft.com/en-us/windows-server/administration/openssh/openssh_keymanagement
1 Create an SSH environment
Open the Code tab in Claude Desktop. Click the environment selector below the message box, then New environment.
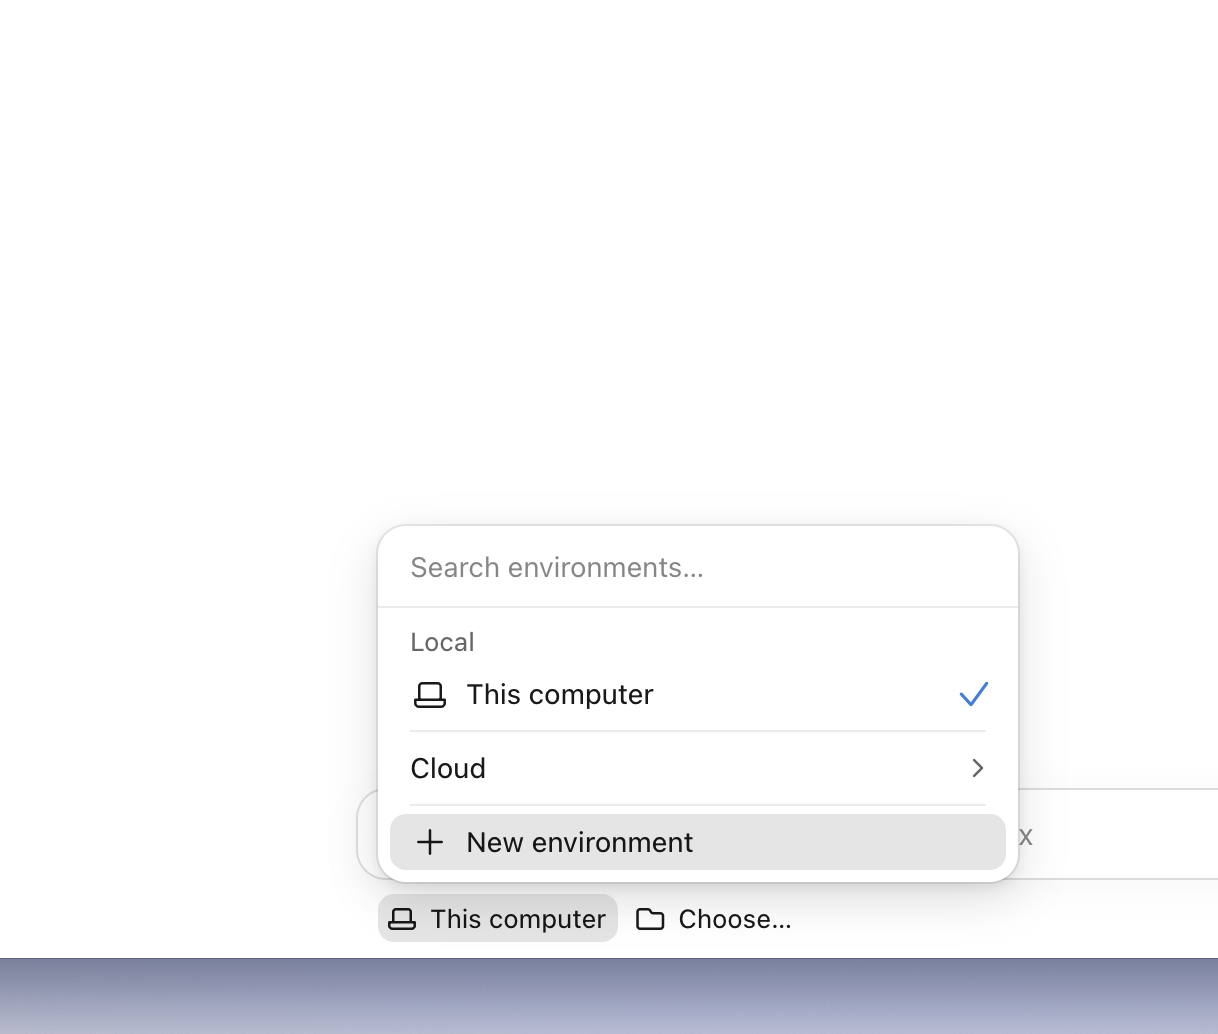
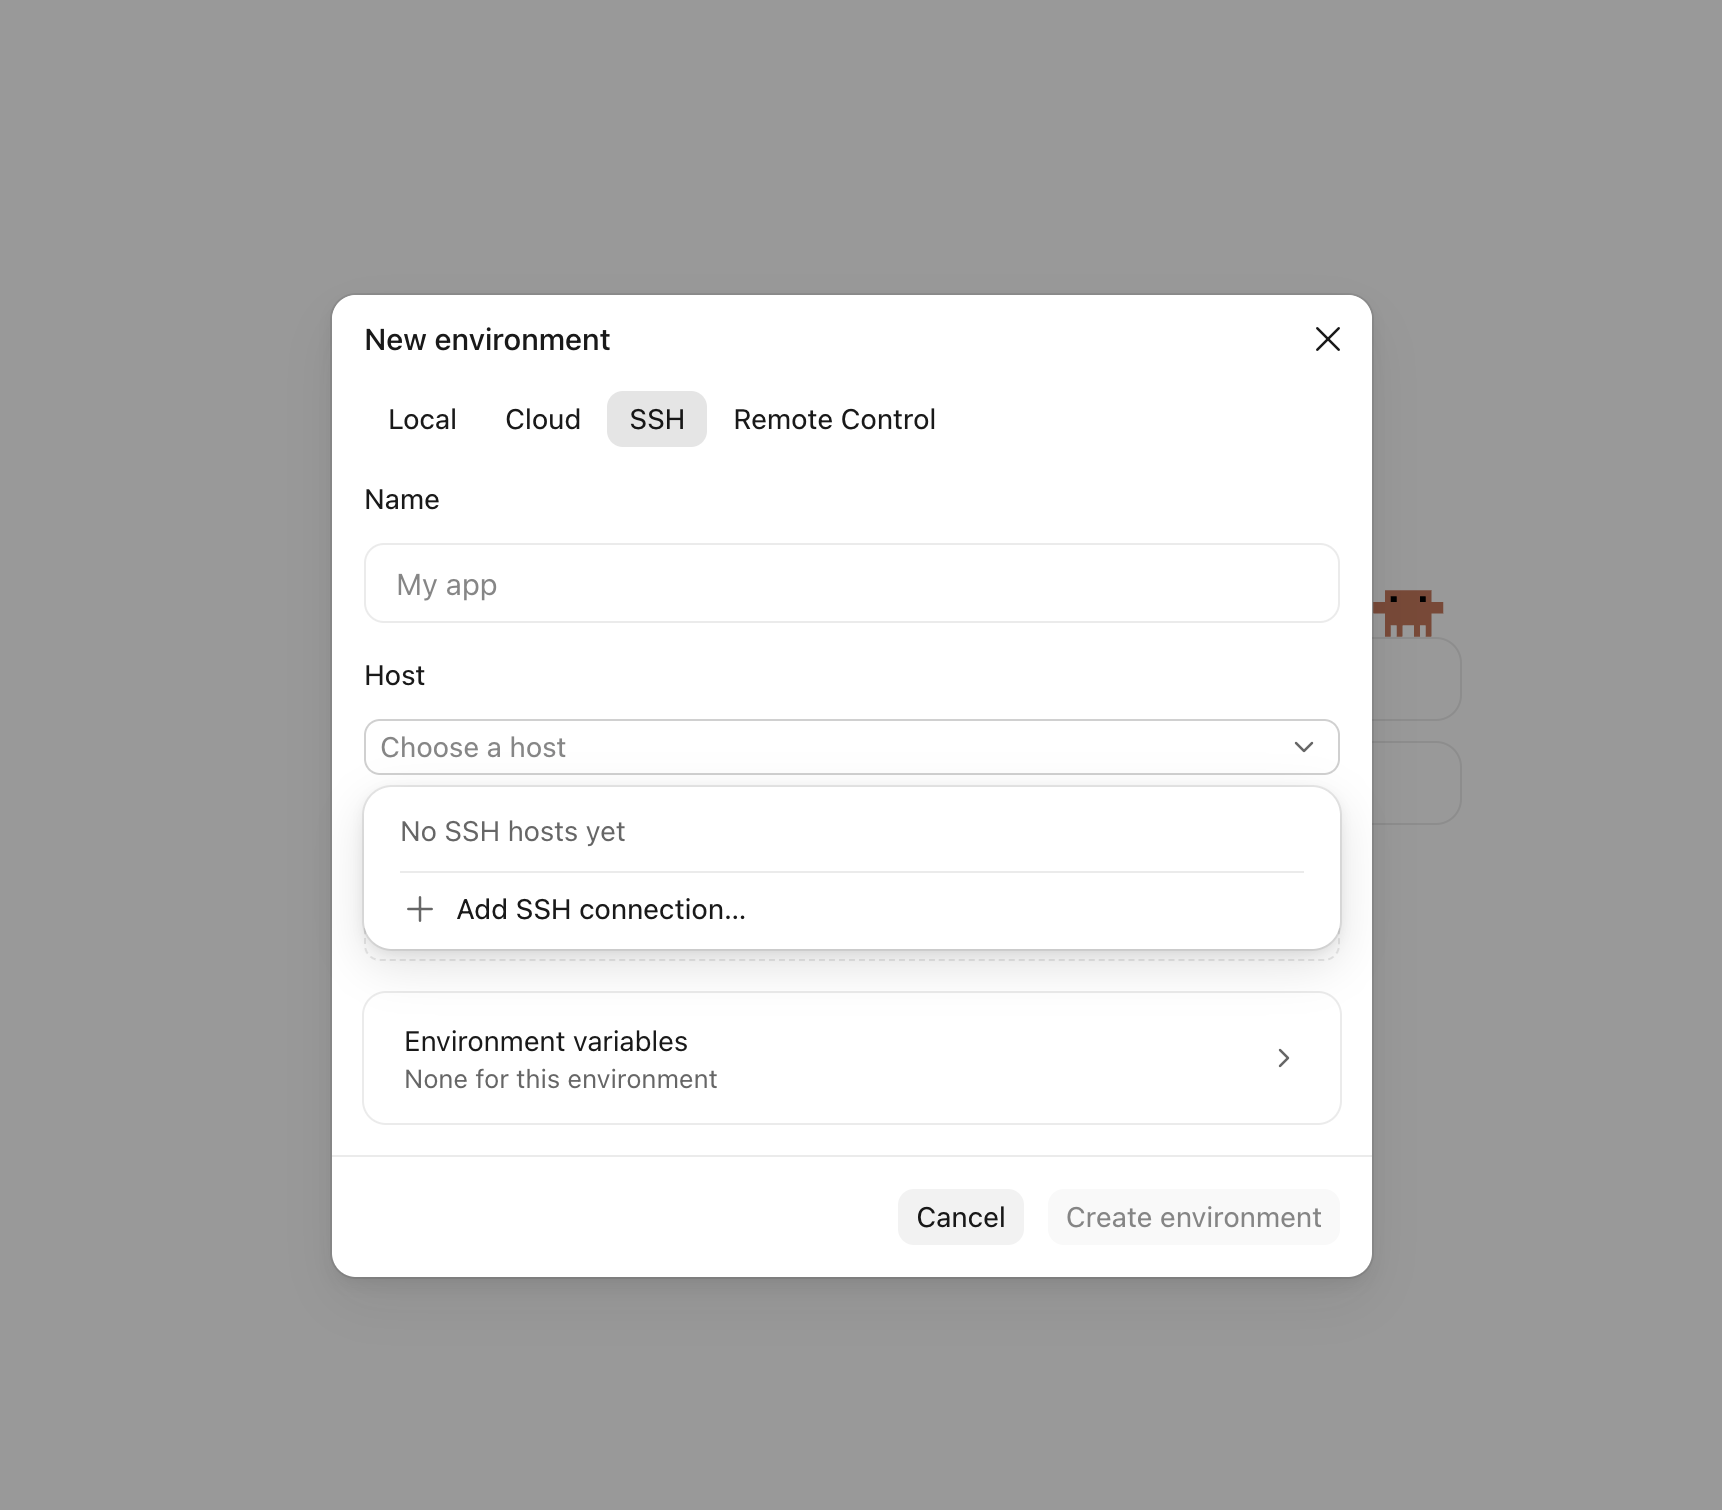
Select SSH. Give the environment a clear name, such as Website staging. Open the Host dropdown and choose Add SSH connection….
2 Add the connection details
These are the main fields:
- Name: a label you will recognise.
- SSH host: your username and server address together, for example siteuser@server.example.com.
- SSH port: leave blank for the default port 22, unless your host gives you another port.
Leave SSH key blank if your existing SSH setup handles authentication. Otherwise, select the private key configured for that server account. Leave Worktree folder blank for this basic setup.
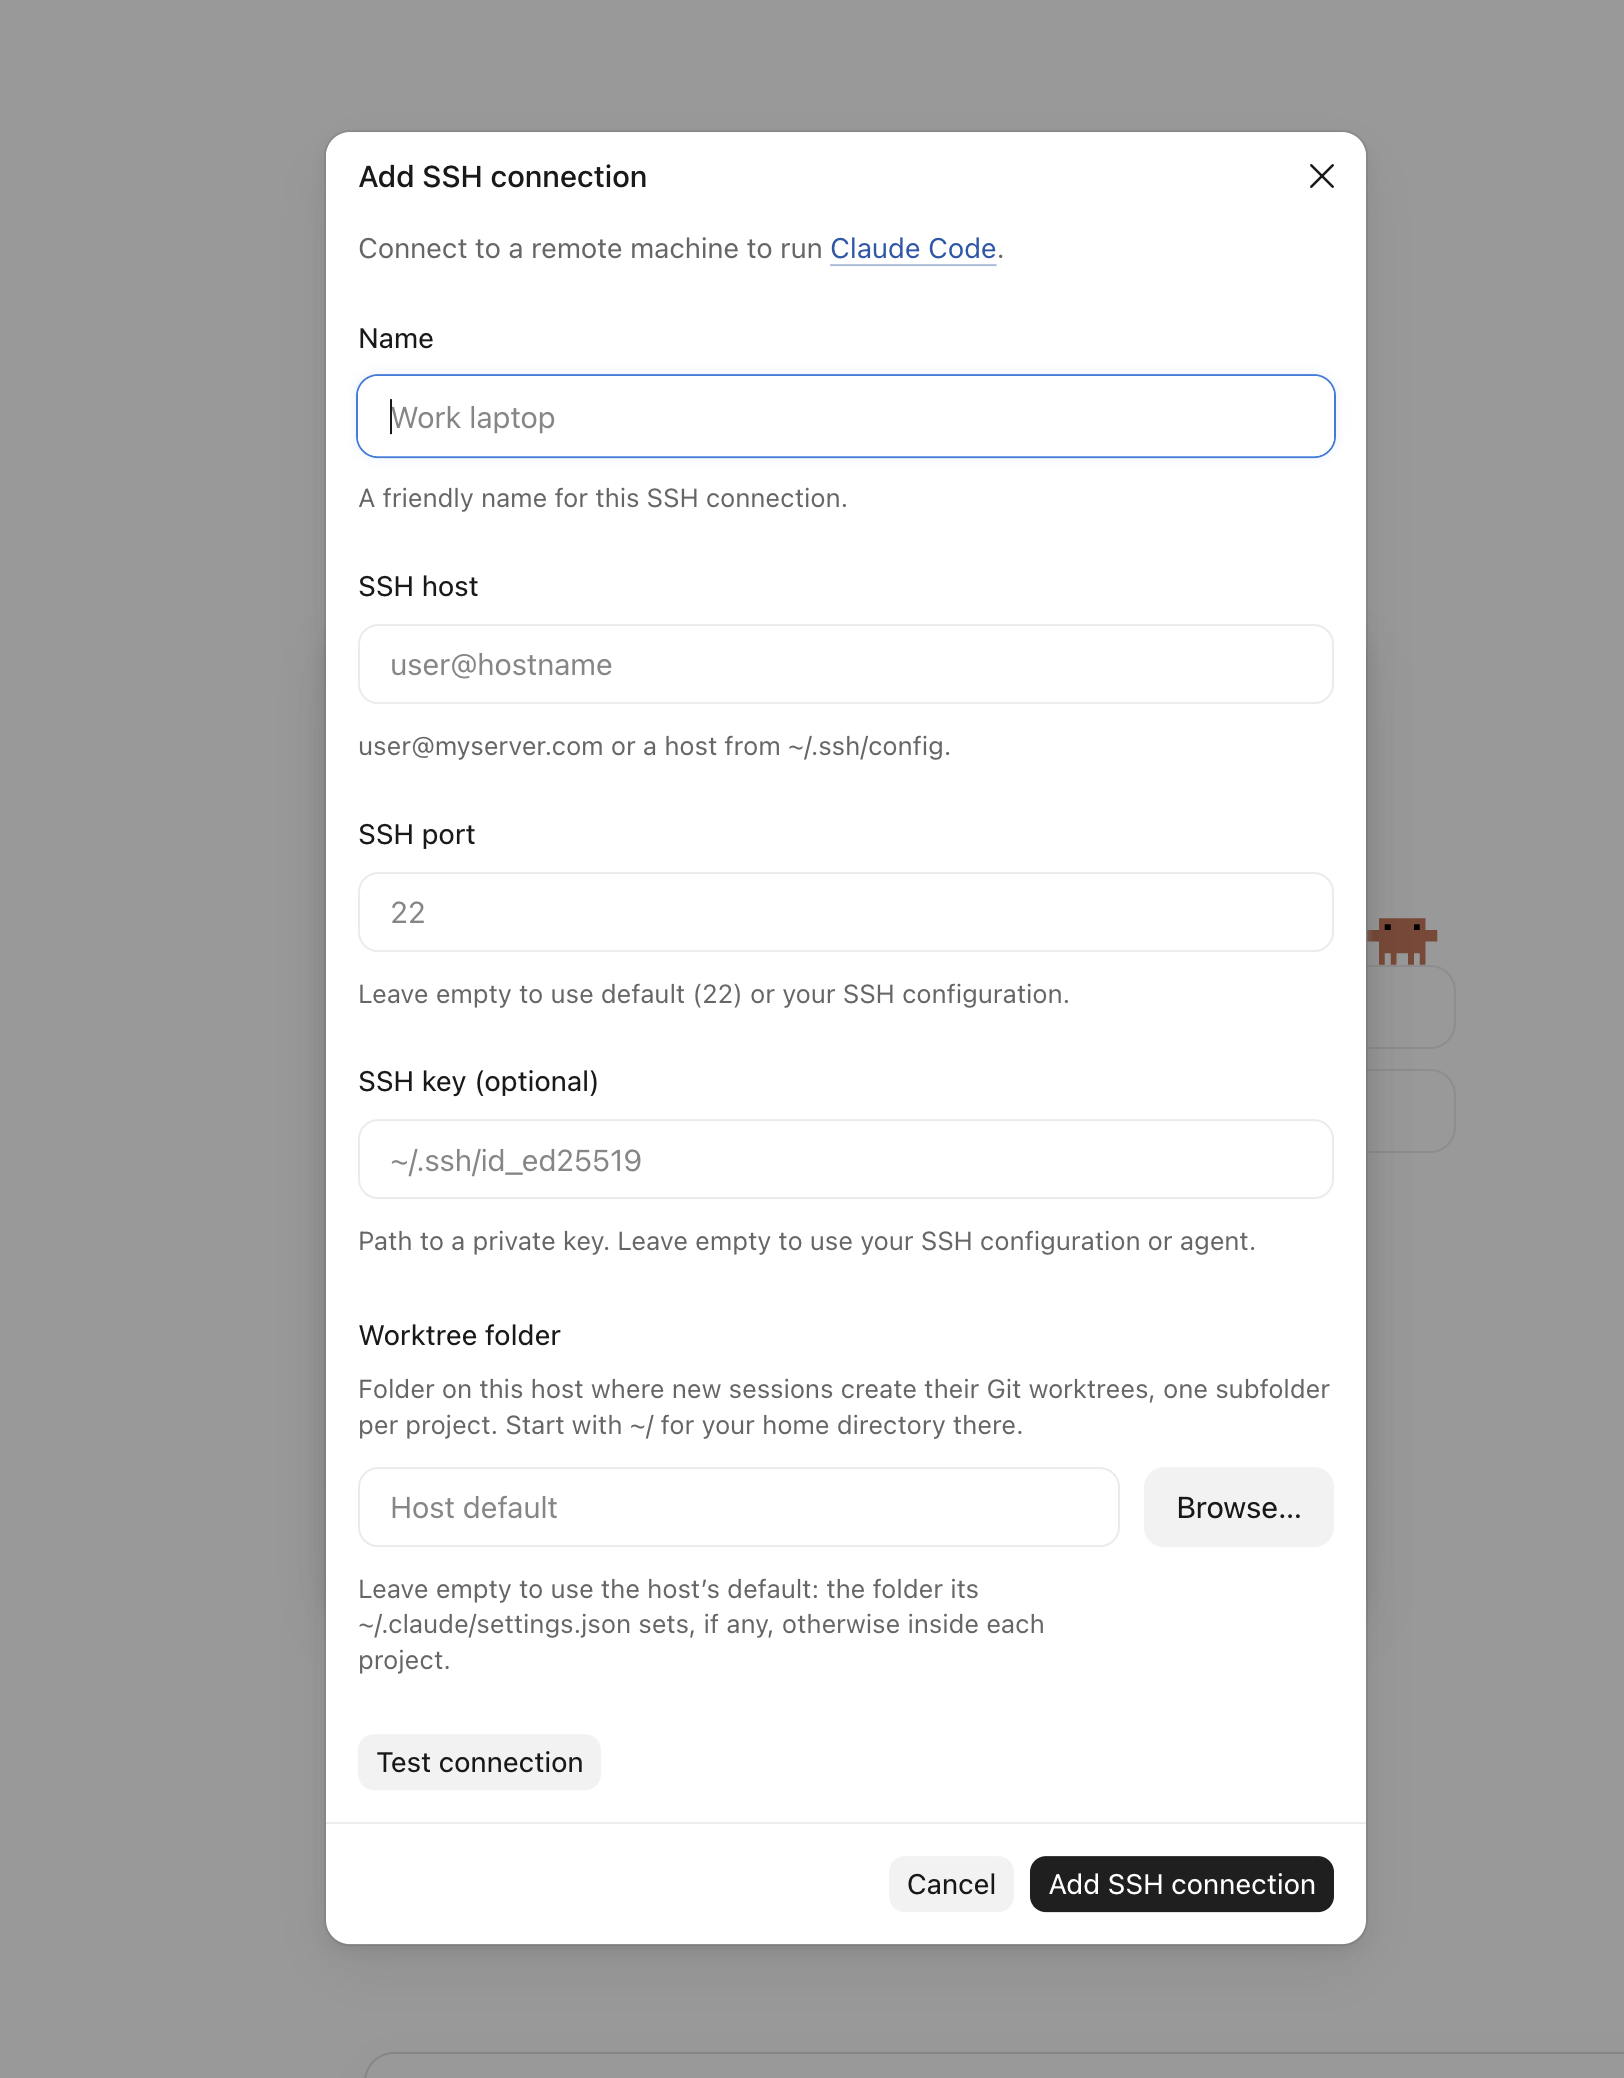
Click Test connection, then Add SSH connection. If the test fails, check the account has SSH access, rather than only file-transfer access.
3 Choose the remote website folder
Back in New environment, select your saved host. Under Folders, click + Add and browse to the website directory on the server.
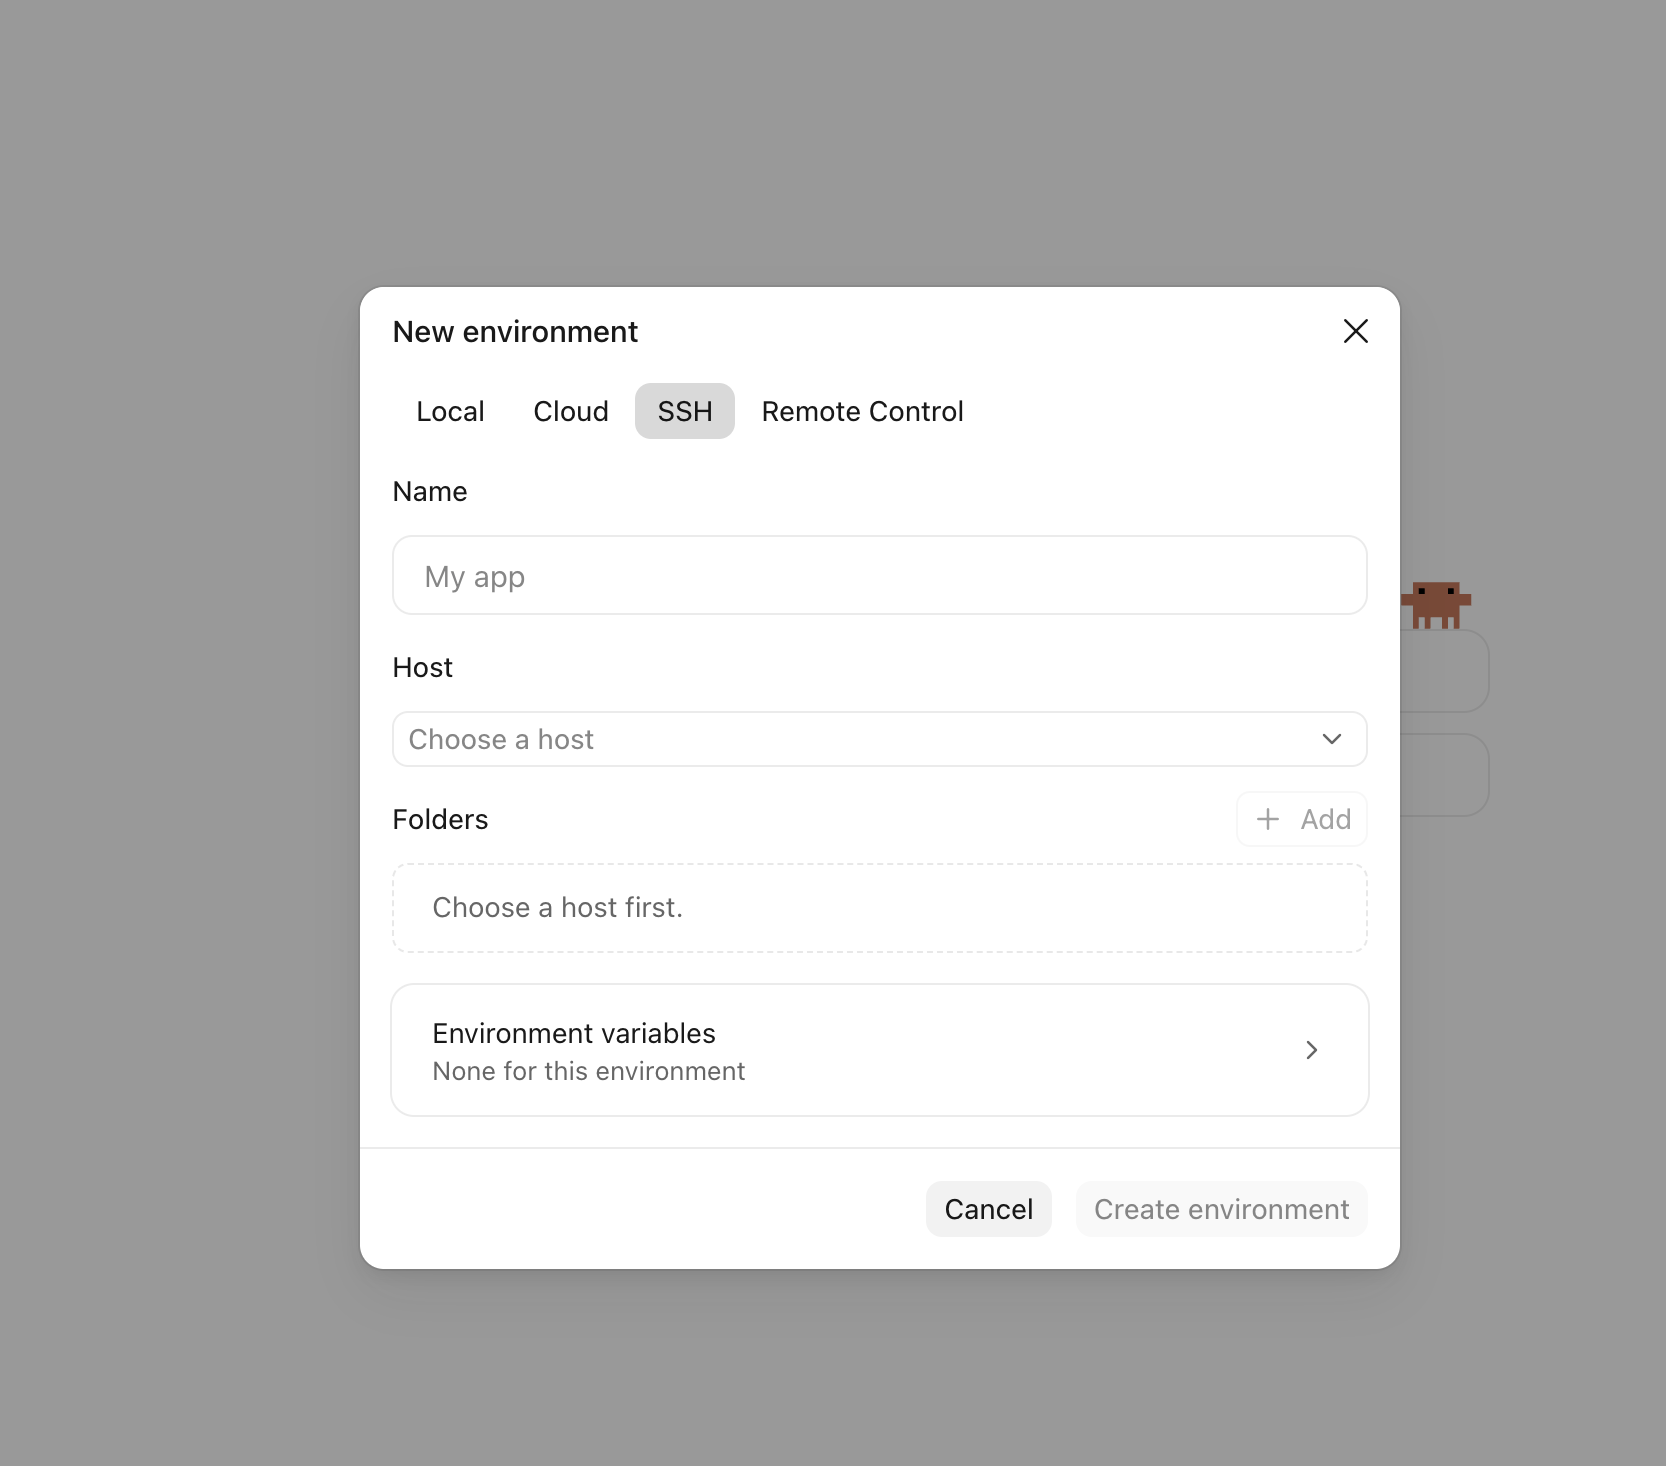
This is the important part: choose the folder for the website you want Claude to work on, rather than the server’s top-level directory or a folder containing several sites.
Common website paths include:
- /home/username/public_html on many cPanel setups.
- /home/username/webapps/site-name on many RunCloud setups.
- /var/www/site-name on some VPS setups.
These are examples. Your host’s actual path may be different. Check the site’s document root in your hosting panel if you are unsure. An SFTP account can show a restricted view of the server, so its displayed path may differ from the full SSH path.
For a WordPress site, look for wp-admin, wp-content and wp-includes. If you only want to edit a custom theme, you can choose its folder inside wp-content/themes/ instead.
Worktree folder is a separate setting. It controls where Claude puts separate Git working copies. It is not the field for selecting your website directory.
4 Save and check the folder
Leave Environment variables empty for this setup and click Create environment.
Start with a simple request: “Show me the current folder path and list its files. Do not change anything yet.” Check that the result matches the intended site before asking Claude to edit files.
If you are using a separate Git worktree, its changes still need to be deployed to the website. Confirm where edits are being saved before expecting them to appear online.
Official SSH setup details: https://code.claude.com/docs/en/desktop#ssh-sessions